Workflow Builder


Create automated workflows without technical expertise
Overview
The Workflow Builder is an AI-powered feature that lets you create automated workflows without needing technical expertise. Whether you want to update your CRM automatically after calls, generate coaching insights, or streamline repetitive tasks, the Workflow Builder helps you design and launch these automations in minutes instead of hours.
The real power? You simply describe what you need, and the AI handles the technical setup for you.

Key Terms to Know
Workflow: An automated sequence of actions triggered by specific events.
Nodes: Individual building blocks within a workflow that perform specific tasks.
Trigger: The event that starts your workflow.
Why Use the Workflow Builder?
Before the Workflow Builder existed, creating automated workflows required either deep technical knowledge or hours of meetings with support teams. Now, you can:
Save time by automating repetitive tasks like CRM updates after every call
Reduce errors by letting automation handle data entry consistently
Test ideas quickly—go from concept to a working workflow in under five minutes
Iterate easily—make changes on the fly as your needs evolve
How to Start: The Basic Process
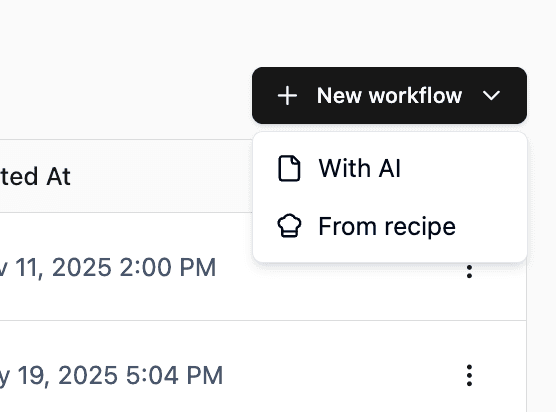
Step 1: Navigate to Workflows and Click "Build with AI"
Go to your workspace and select Workflows
Click the "Build with AI" button
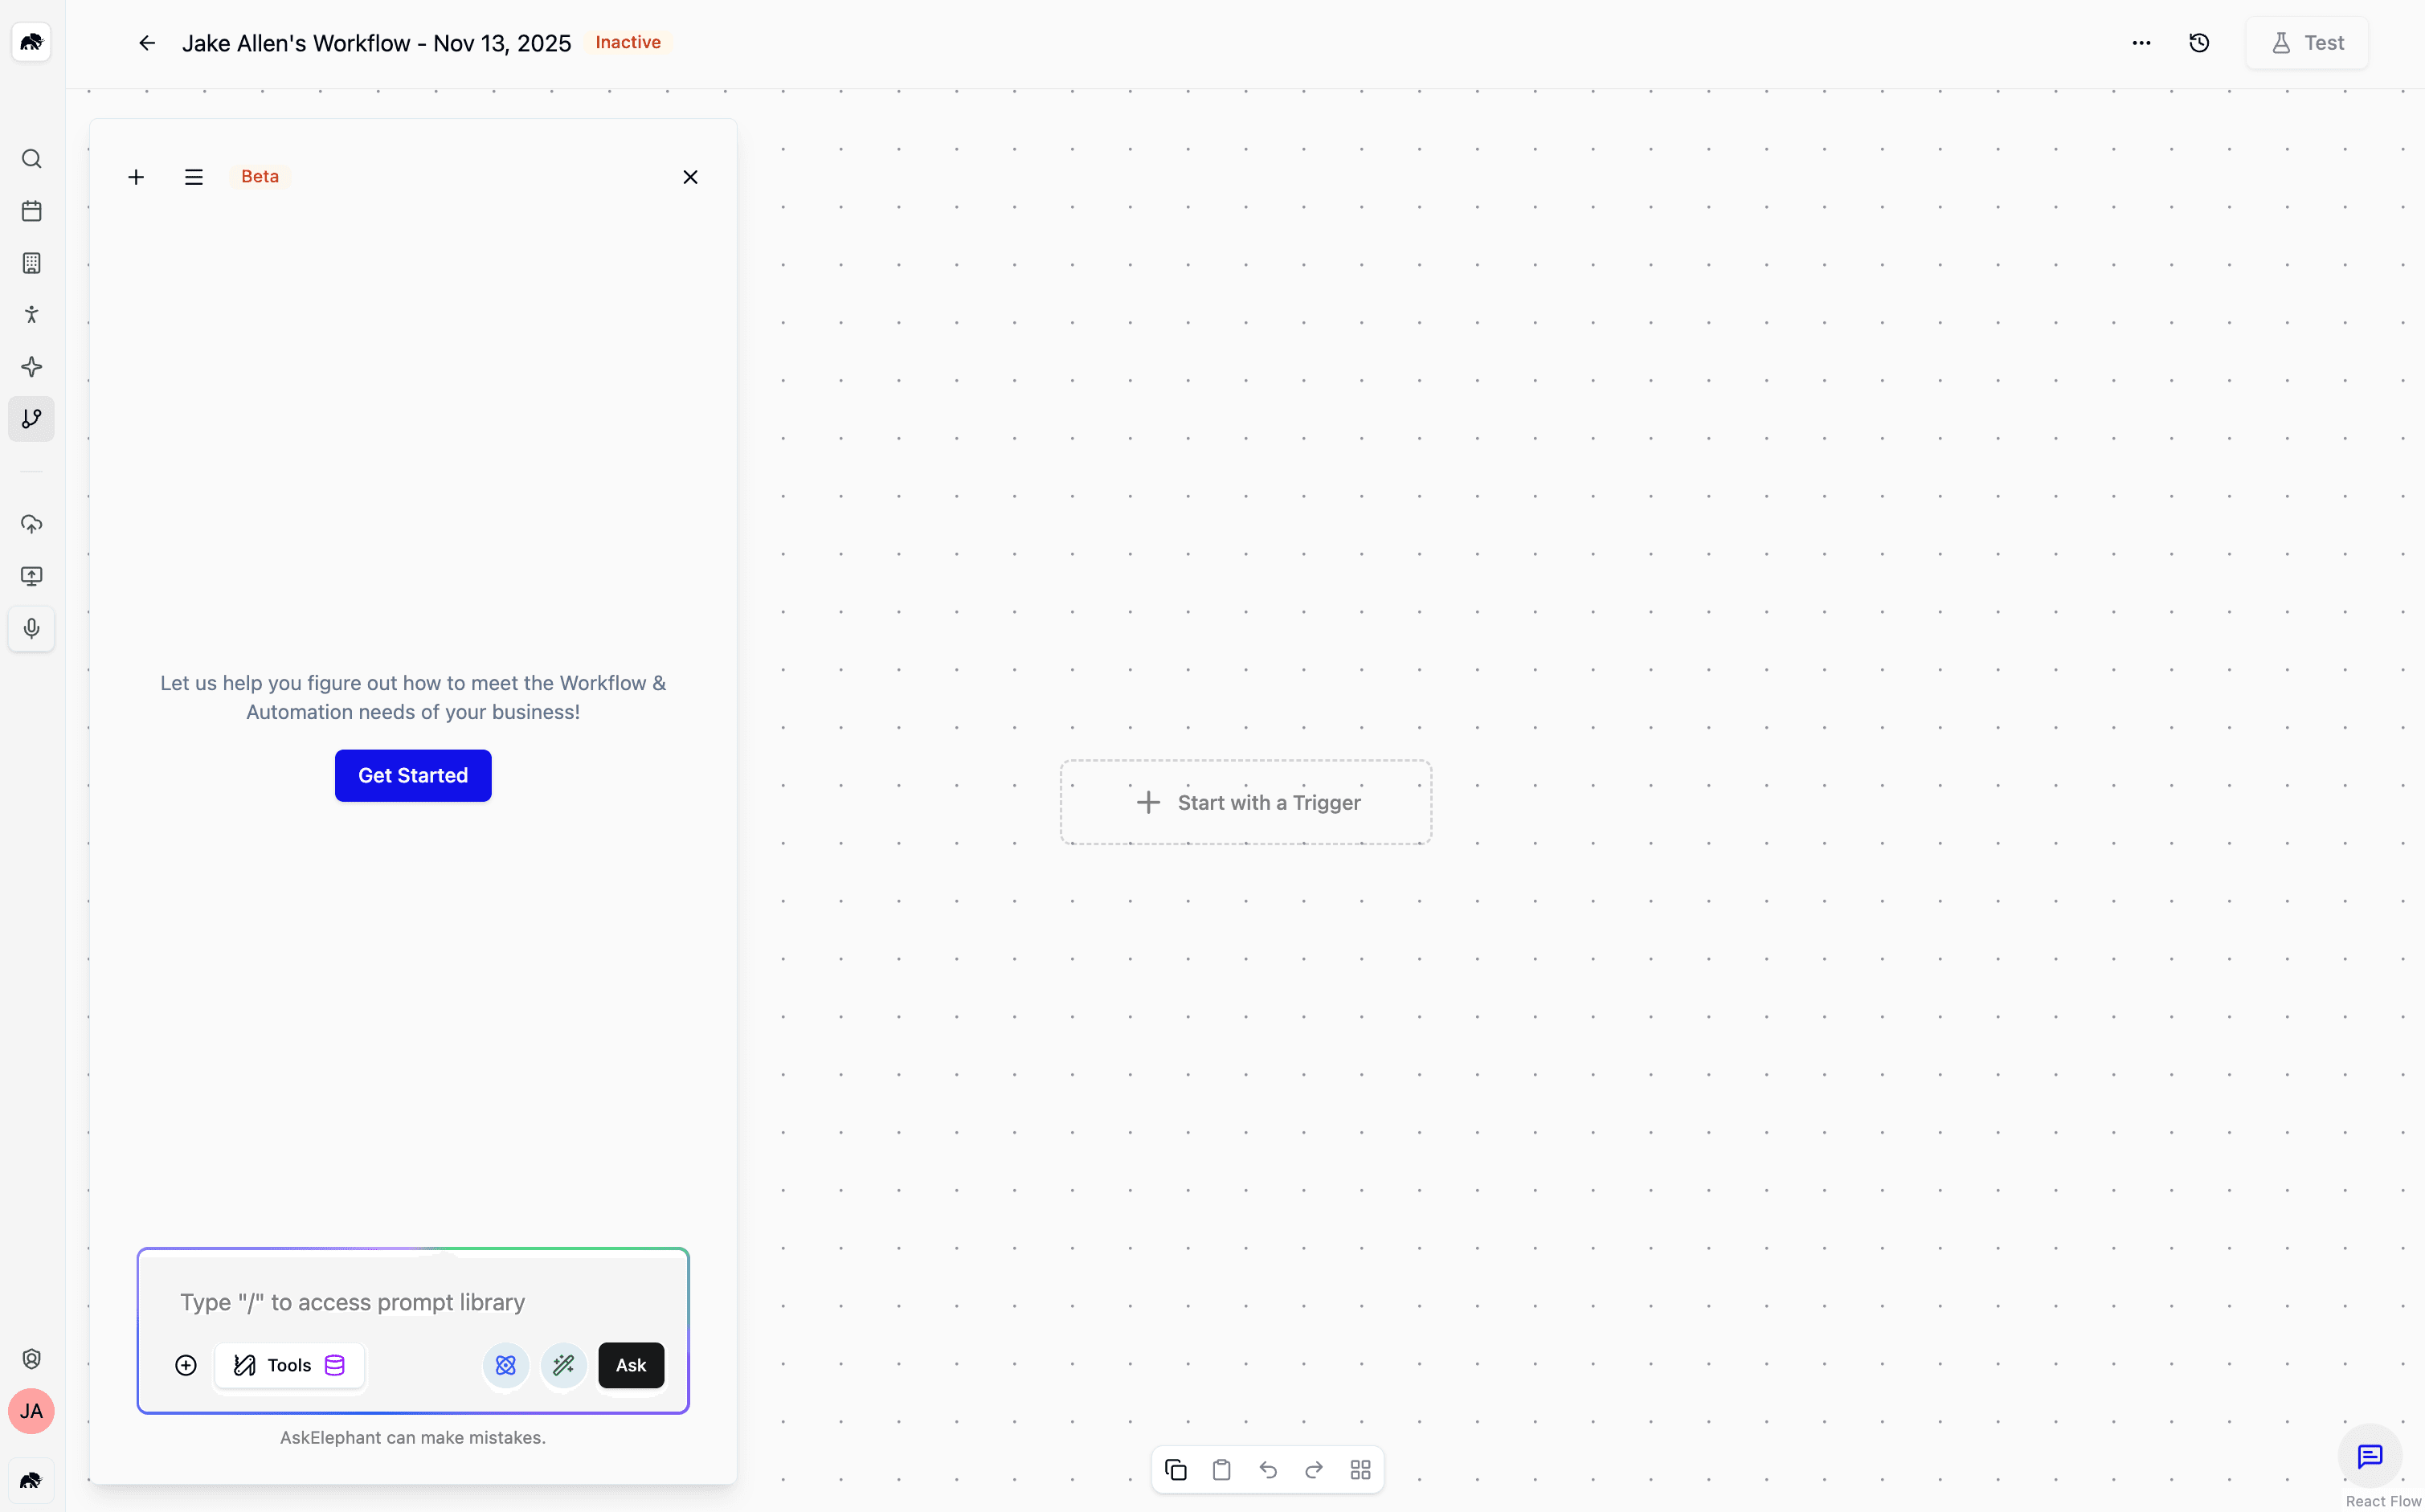
The Workflow Builder chat will open, ready to help you create your first workflow
Step 2: Describe What You Want to Automate
Tell the AI what outcome you're trying to achieve. Be specific about:
What triggers the workflow (e.g., "when a sales call ends")
What data you want to capture (e.g., "deal stage, call notes, attendees")
What should happen next (e.g., "update HubSpot with this information")
Example prompt:
"I want to automatically update HubSpot after every sales call. Capture the deal stage, add notes from the call, and mark the next follow-up date."
Step 3: Have a Conversation with the Builder
The Workflow Builder works like a collaborative discussion, not a one-shot request. Here's what happens:
You submit your request
The AI may ask clarifying questions like "Which HubSpot fields should I update?" or "What information comes from the call?"
You provide more details
The AI refines the workflow based on your answers
Once everything is clear, the builder creates your workflow
This back-and-forth usually takes 30 seconds to one minute and ensures the final workflow matches exactly what you need.
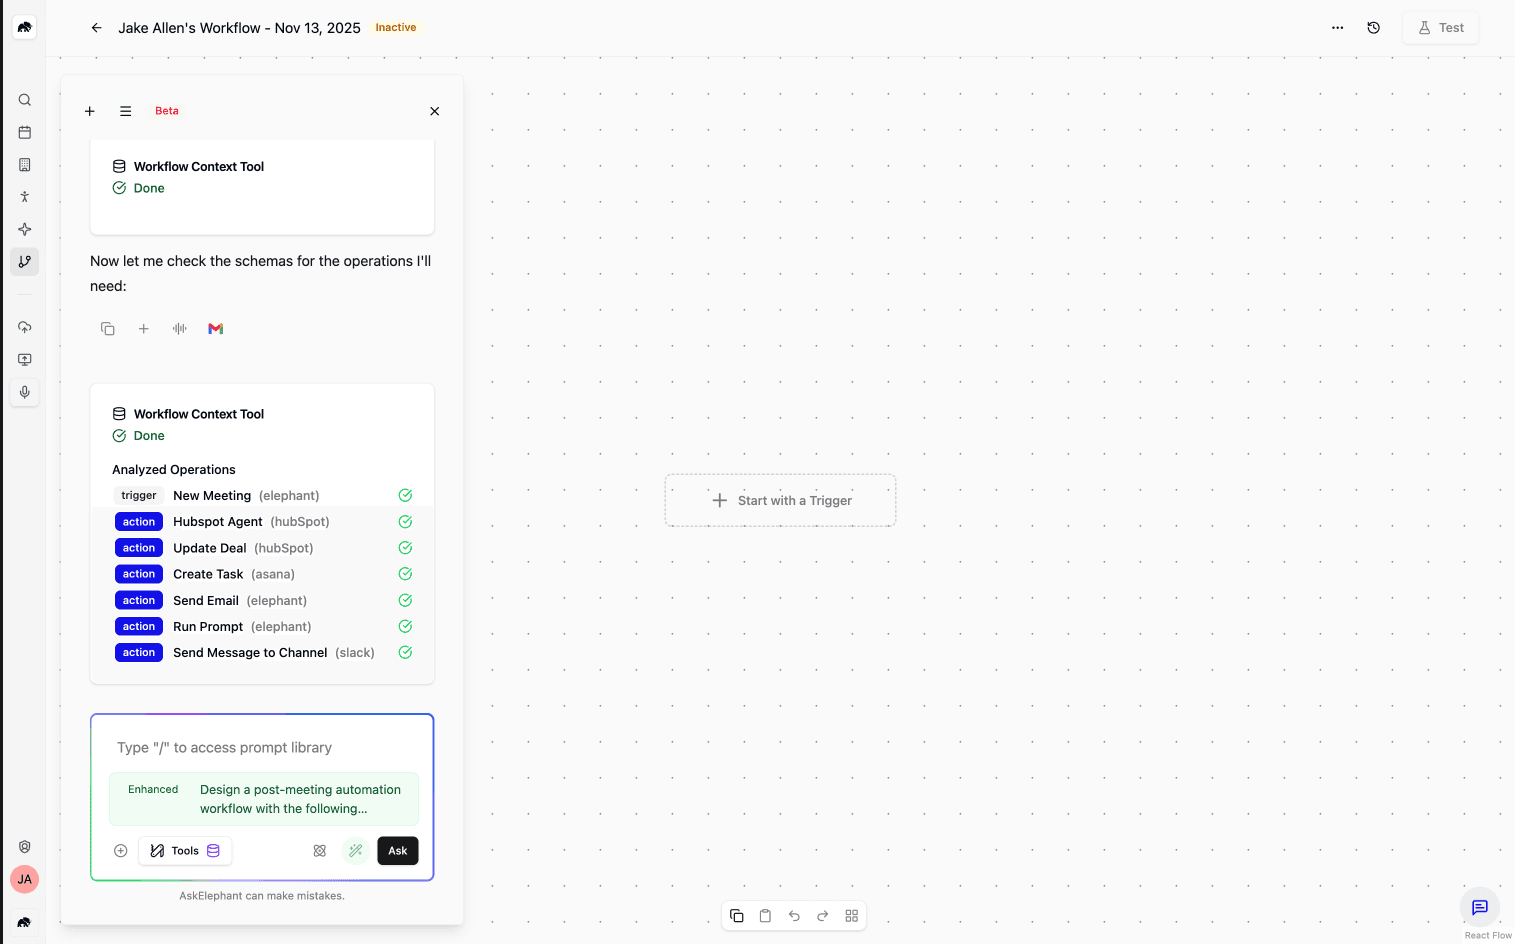
Pro Tip: If the AI asks you to enable tools like the HubSpot agent, mention it in your prompt instead: "Use the HubSpot agent to check what fields are available on deals and contacts." The builder will access that information automatically.
What Happens When the Builder Creates Your Workflow
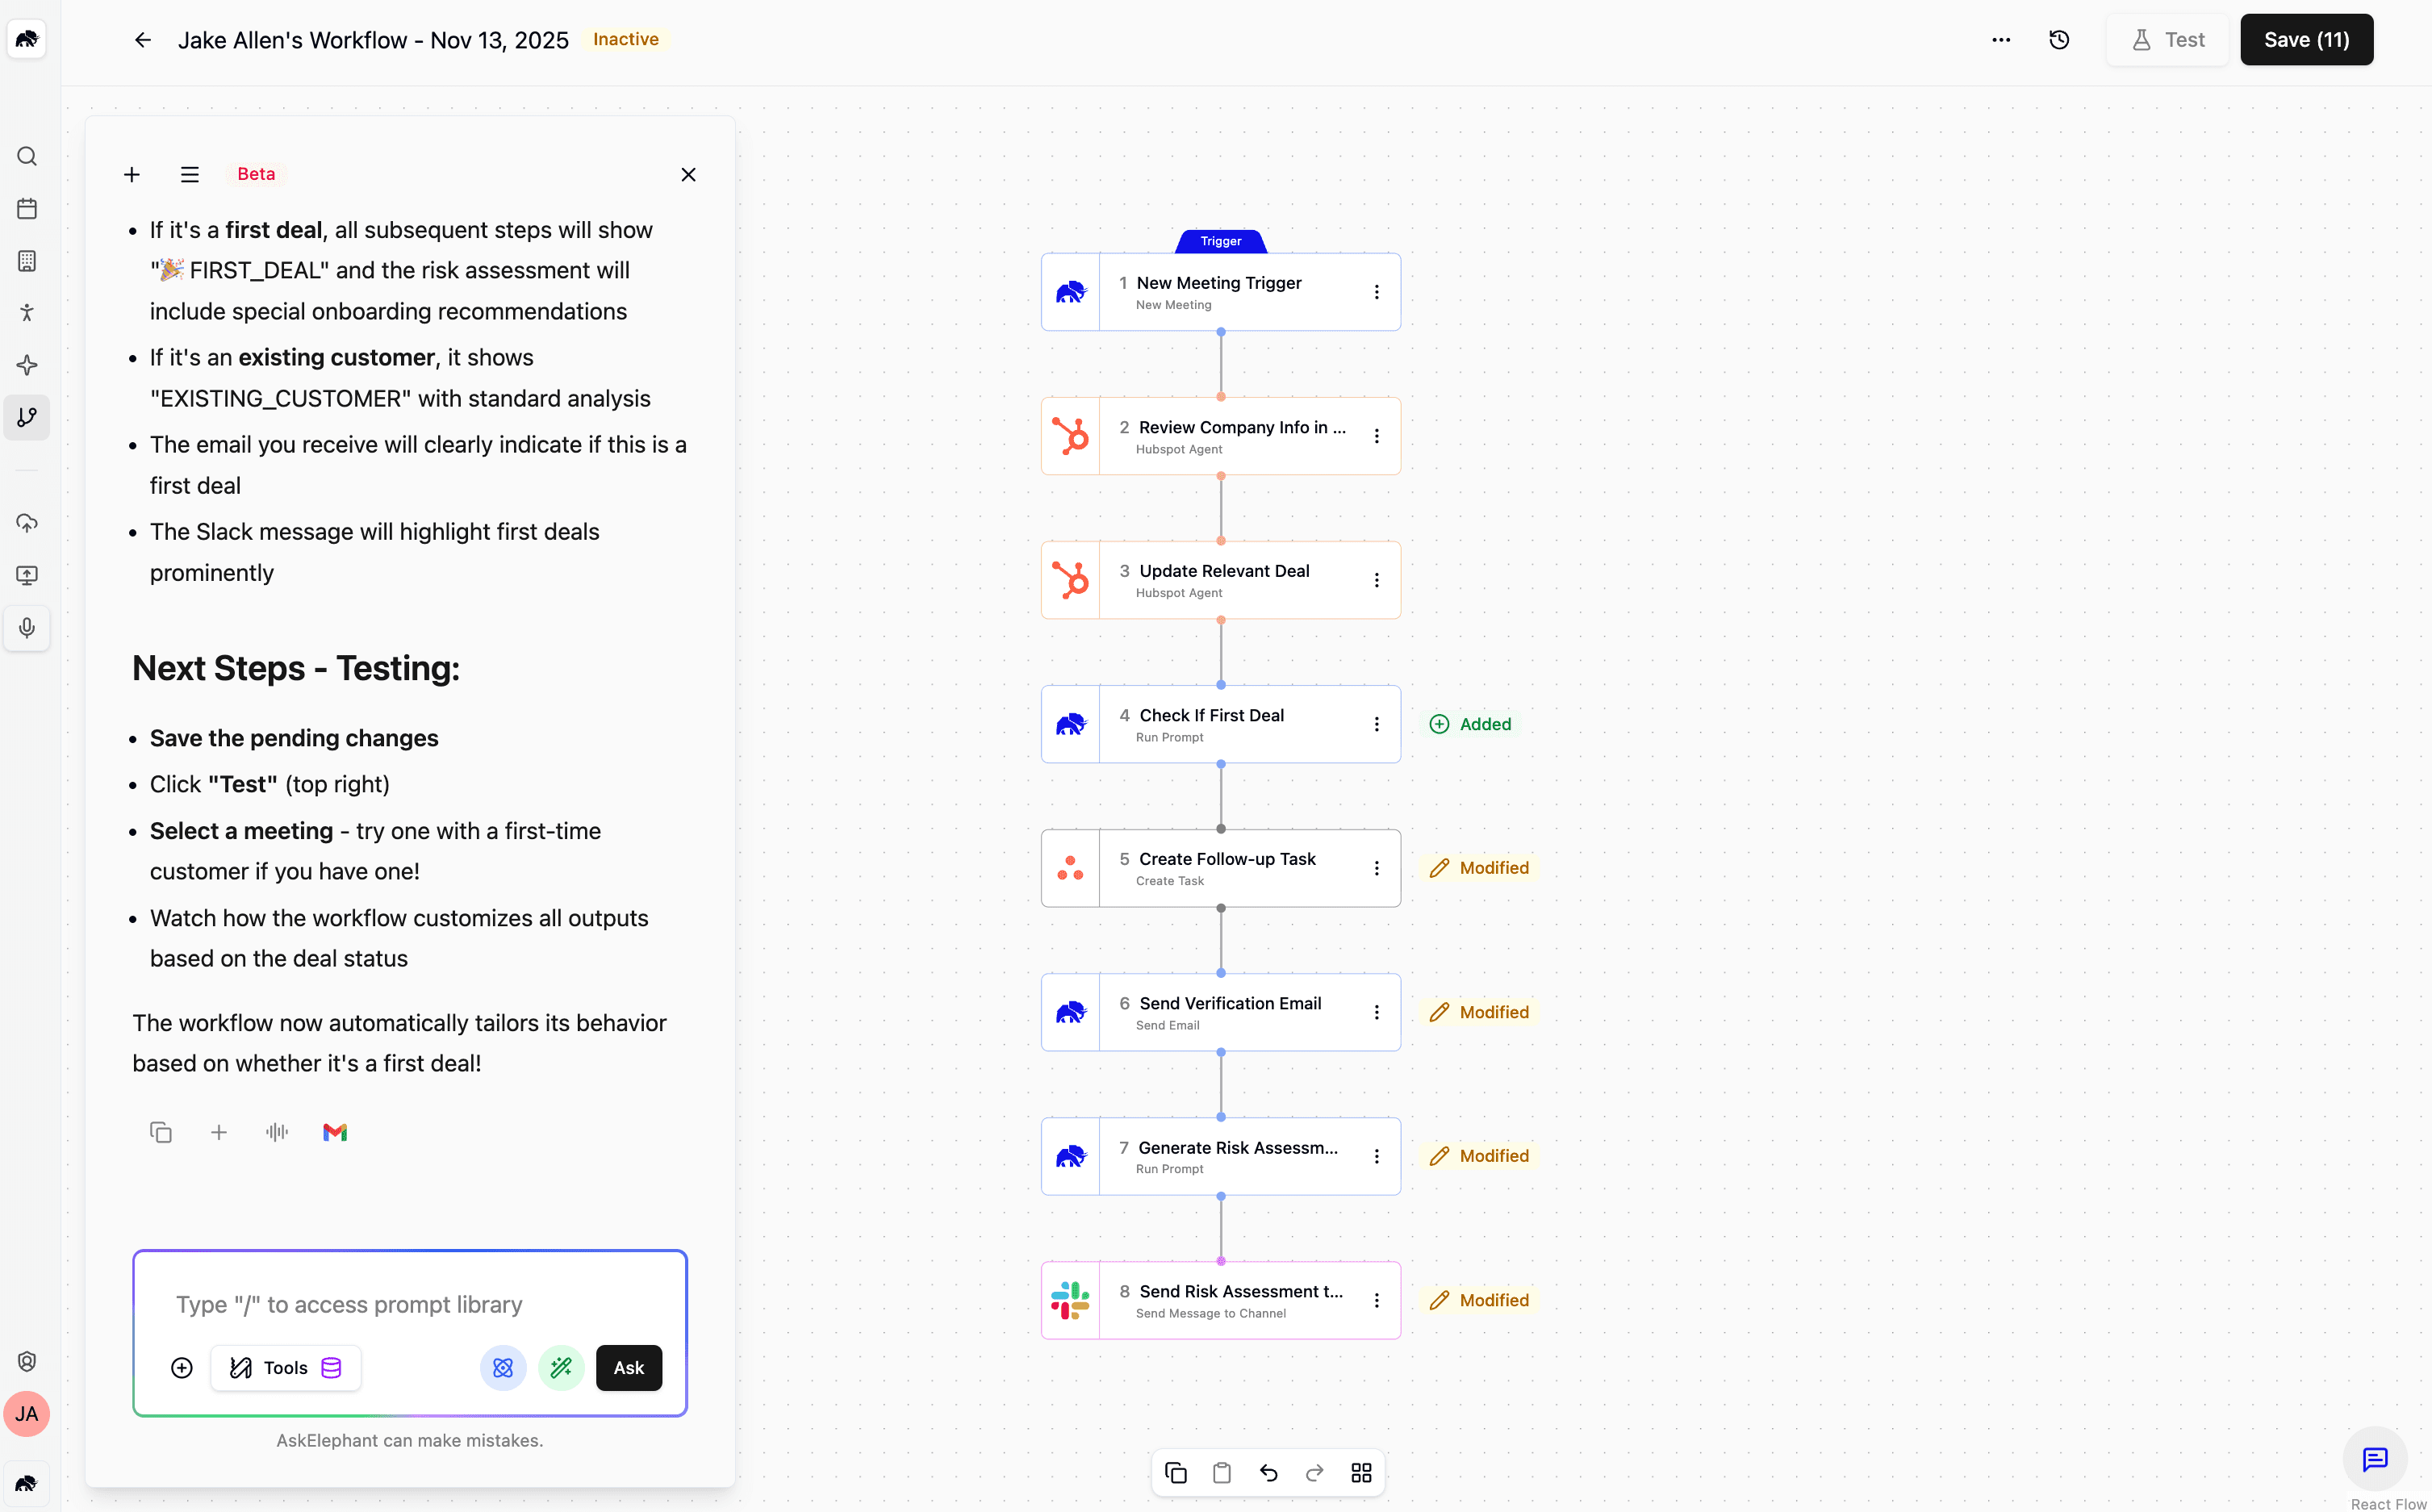
Once the AI has enough information, it builds a workflow and shows you:
What was built: A visual representation of all the nodes (steps) in your workflow
What it does: A description of the workflow's purpose and how it works
How to test it: Step-by-step instructions for validating that it works as intended
The workflow is now live and ready to use.
Making Changes: The Iterative Approach
One of the best features of the Workflow Builder is that workflows aren't set in stone. Need to adjust something? You have two options:
Option 1: Make Quick Tweaks
Return to the workflow you created
Open the chat and describe the change you want
The builder will modify the existing workflow and update it in seconds
Option 2: Start a New Workflow
If you want something significantly different, start fresh
You can even duplicate an existing workflow and tell the builder what to change, which is often faster than building from scratch
Handling Errors and the "Fix with AI" Feature
Occasionally, workflows may show errors—especially if you manually edit them. When this happens:
You'll see a notification that the workflow has invalid configurations
Click the "Fix with AI" button
The builder analyzes the error and corrects it automatically in 10-15 seconds
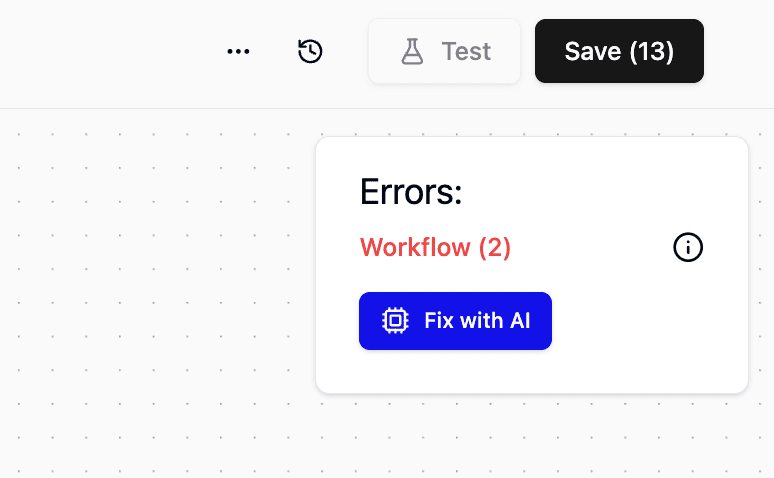
The validation system is strict by design—it ensures the AI doesn't create workflows with mistakes or "hallucinations" (AI-generated inaccuracies). If fixing takes longer than expected, the builder is being extra thorough to get it right.
Getting the Best Results: Best Practices
Be Specific About Your Goal
Instead of: "Help me with CRM stuff"
Try: "Automatically log call summaries to the deal record in HubSpot and update the deal stage based on what was discussed"
Mention the Tools You Use
Tell the builder upfront if you're using HubSpot, Salesforce, or other integrations. This helps it understand what data and actions are available.
Test Before Depending On It
After the builder creates a workflow, follow the testing instructions it provides. Make sure it's doing what you expected before you rely on it for critical tasks.
Come Back to Refine
Your first workflow doesn't need to be perfect. Build it, test it, and then iterate. Small adjustments often lead to big improvements in what the workflow can do for you.
Next Steps
Ready to get started? Here's what to do:
Identify one repetitive task you'd like to automate (CRM updates, email follow-ups, data extraction, etc.)
Navigate to Workflows and click "Build with AI"
Describe your goal and have a conversation with the builder
Test your workflow using the instructions provided
Iterate if needed, or build your next workflow
If you run into challenges or want to explore what's possible, connect with the Herd in our community forum—there are many team members working with the Workflow Builder and happy to share what they've built.
The future of your workflow automation is just a few prompts away.
Need Additional Help?
If you have questions or need further assistance, the AskElephant support team is here to help!
You can reach our support team in several ways:
click the chat button in the bottom right corner of your screen,
email us at [email protected],
or use @askelephant support in your dedicated Slack channel.
We're committed to getting you the answers you need as quickly as possible.
Comments


